Aan de slag met het GPS-Trace Platform
Deze handleiding begeleidt u door de stappen om ons platform te gaan gebruiken.
Laten we beginnen!
Bekijk deze korte video om de eerste stappen en belangrijkste voordelen van ons systeem te ontdekken, zodat u in een mum van tijd aan de slag kunt
Snelstart Roadmap
Volg deze zes eenvoudige stappen om uw GPS-trackingplatform operationeel te krijgen
Registreer in GPS-Trace Console
GPS-Trace Console is uw centrale beheerhub voor het aanmaken en beheren van accounts voor alle GPS-Trace oplossingen.
Registratie is eenvoudig:
- Bezoek de registratiepagina.
- Klik op de Aanmelden knop.
- Vul de vereiste velden in.
- Bevestig uw e-mail.
Dat is alles! U heeft nu toegang tot het platform.
Wat GPS-Trace Console u biedt:
-
 Maak accounts en eenheden aan in elke oplossing op het GPS-Trace platform.
-
Configureer abonnementen en beheer daarmee de applicatiefunctionaliteit.
-
Pas branding aan met uw logo en kleuren.
-
Krijg hulp met de ingebouwde 24/7 AI-assistent en documentatie
-
Gebruik Platform API voor geavanceerde integraties.
Voor Dienstverleners
-
 Hulpmiddelen voor betalingsinning (Stripe/PayPal).
-
Mogelijkheden voor technische ondersteuning op afstand.
-
Automatische blokkering van gebruikers bij wanbetaling.
-
Dealerkaart vermelding en profielweergave in de klantapplicatie.
Activeer 30-daagse Proefperiode
Na registratie activeert u uw proefperiode direct in de platformconsole om de volledige functionaliteit van het platform gratis te verkennen.
Wat u kunt testen tijdens de Proefperiode:
-
 2 accounts met toegang tot de Forguard-applicatie (tot 30 eenheden per account)
-
2 accounts met toegang tot de Tags-oplossing (tot 10 sensoren per account)
-
Configuratie van plannen met verschillende functies en limieten
-
Kernfuncties ontgrendeld — multi-gebruikerstoegang, aangepaste branding, enz.
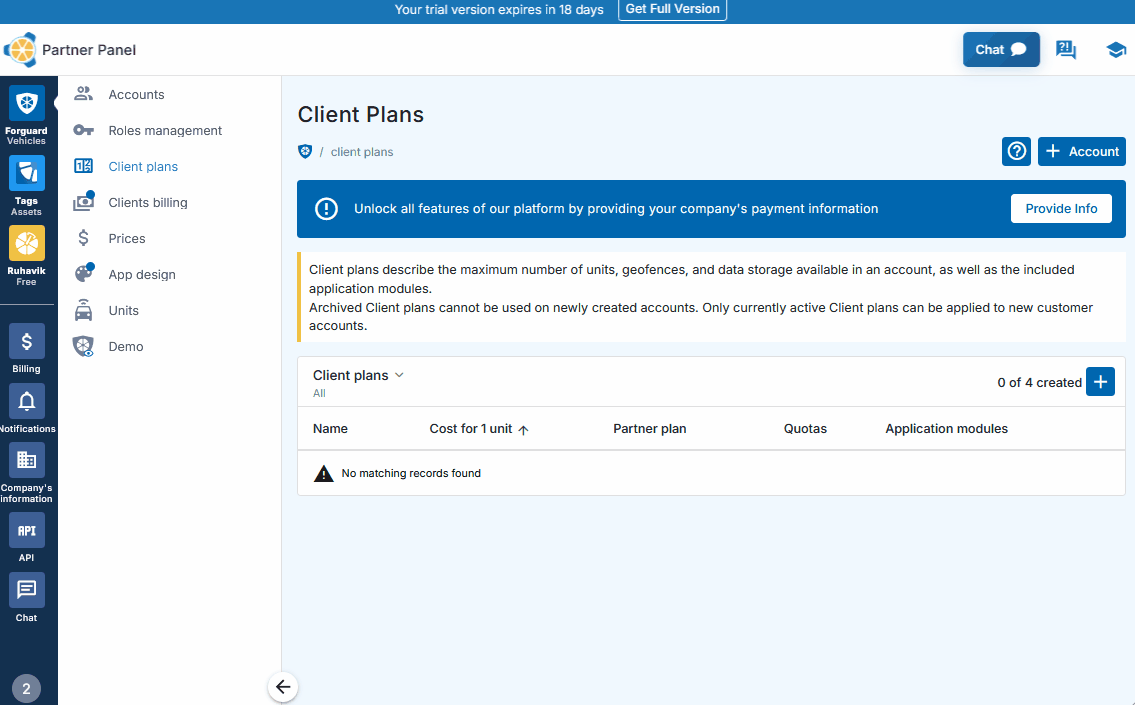
Abonnement Aanmaken
Het GPS-Trace Platform verbindt u met twee trackingoplossingen: Forguard en Tags.
Voordat u een account met toegang tot Forguard of Tags aanmaakt, moet u een Klantabonnement instellen - een configuratie die bepaalt welke functies beschikbaar zijn en welke limieten gelden.
Klantabonnementen zijn gebaseerd op Partner Abonnementen van GPS-Trace. U kunt alle beschikbare Partner Abonnementen en hun prijzen hier bekijken.
Uw Eerste Abonnement Aanmaken
- Navigeer naar de Forguard of Tags sectie in GPS-Trace Console
- Ga naar het Klantabonnementen tabblad
- Klik op de "+" knop om een nieuw abonnement aan te maken
- Stel maximale limieten in (eenheden, geofences, historieperiode)
- Selecteer functies om te activeren
- Sla uw abonnement op
Voor Dienstverleners
Klantabonnementen stellen dienstverleners in staat verschillende servicepakketten te creëren met variërende functies en prijspunten. Dealers kunnen gelaagde opties aanbieden (Basis, Professional, Enterprise enzovoort) aan verschillende klantsegmenten en hun eigen prijzen bepalen.
De winstmarge is het verschil tussen wat dealers hun klanten in rekening brengen en wat zij aan GPS-Trace betalen.
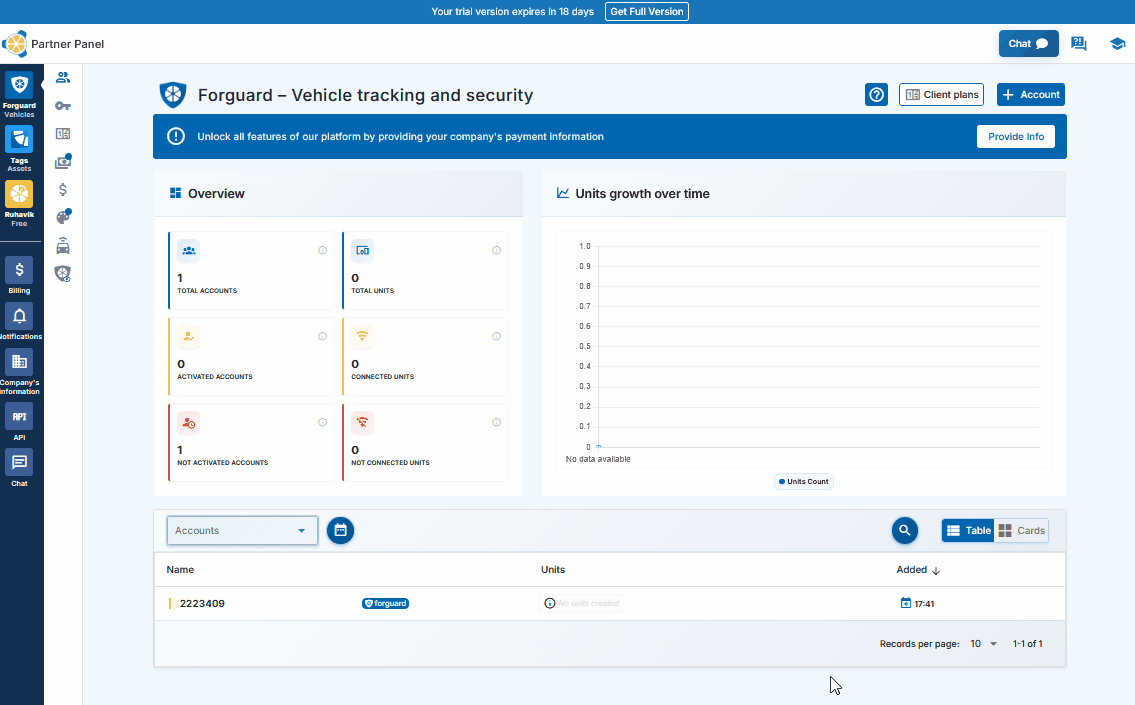
Account Aanmaken
Nu u een Klantabonnement gereed heeft, is het tijd om een account aan te maken dat toegang geeft tot de applicatie (Forguard of Tags).
Een Account Aanmaken
- Ga naar het Forguard of Tags tabblad in GPS-Trace Console
- Klik op de blauwe "+" knop in de Accounts sectie
- Selecteer het eerder aangemaakte Klantabonnement uit het dropdown menu.
- Klik op de 'Opslaan' knop.
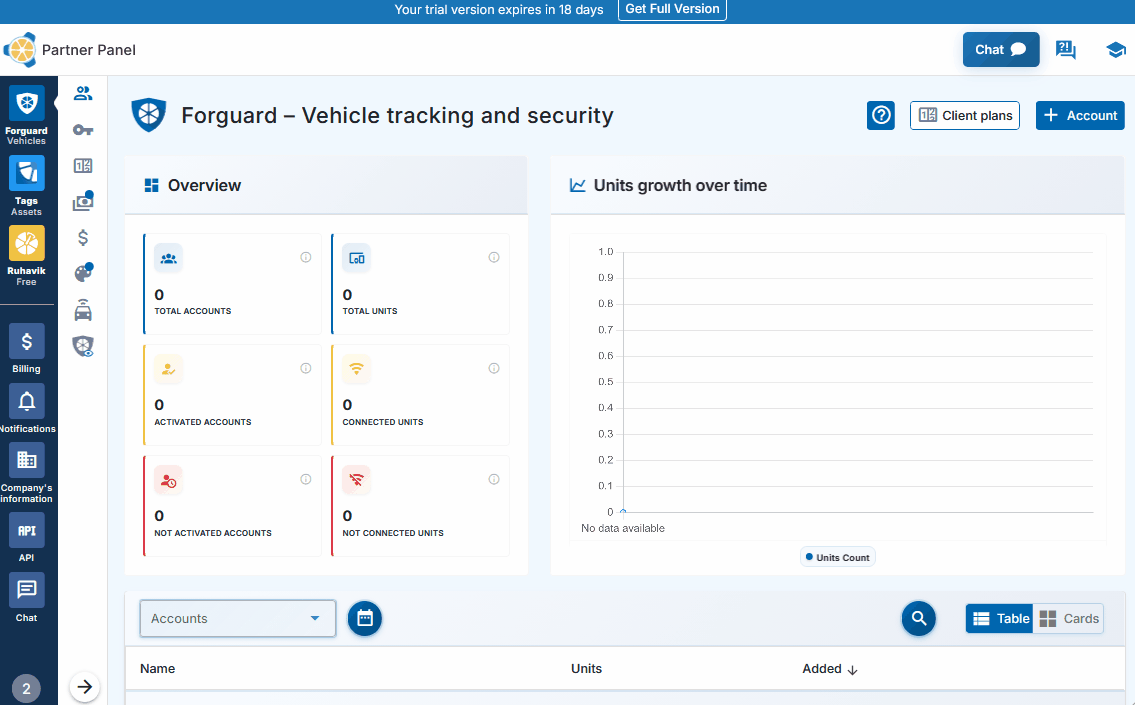
Klaar! Het account wordt direct aangemaakt.
Om de applicatie te gaan gebruiken, activeert u het account door inloggegevens in te stellen via de activeringslink of QR-code. Dit kunt u zelf doen (als u het voor uw eigen bedrijf gebruikt) of delen met een klant voor hun activering.
Multi-User Toegang en Rechten
Het platform ondersteunt multi-user toegang tot applicaties met rechtenbeheer. Extra gebruikers kunnen direct in GPS-Trace Console worden aangemaakt met aangepaste toegangsniveaus.Twee hulpmiddelen helpen bij het organiseren van teamtoegang:
Rollen - bepalen welke functies gebruikers kunnen openen (meldingen, rapporten, geofences, commando's) en welke acties zij kunnen uitvoeren (bekijken, aanmaken, bewerken, verwijderen)
Toegangslijsten - bepalen welke specifieke apparaten (eenheden) elke gebruiker kan zien, handig voor het scheiden van toegang per team, regio of voertuigtype.
Eenheid Aanmaken
Eenheden zijn de fysieke GPS-trackers of gateways die gegevens verzamelen en naar het platform verzenden. Zonder eenheden heeft het account geen apparaten om te volgen. Het aanmaken van eenheden verbindt uw hardware met het systeem.
Eenheden Aanmaken in Forguard
- Selecteer het account waaraan u een eenheid wilt toevoegen
- Klik op het "+" icoon in de Eenheden sectie
- Selecteer het model van uw GPS-apparaat (tracker) uit de lijst.
- Voer apparaatgegevens in (IMEI, wachtwoord indien vereist)
- Klik op de 'Opslaan' knop
Als uw apparaat correct geconfigureerd is en gegevens verzendt, ziet u het binnen enkele minuten online.
Gateways, sensoren en assets in Tags
Tags werkt met 3 soorten entiteiten:
-
Gateways — GPS-trackers die BLE-sensoren detecteren en gegevens verzenden
-
Sensoren — gegevensbronnen die aan een asset kunnen worden gekoppeld (BLE-tags, bekabelde sensoren of parameters van gateways).
-
Assets — fysieke objecten die waarde hebben voor de gebruiker en moeten worden gevolgd (container, trailer, gereedschap, apparatuur).
Het aanmaken van gateways volgt hetzelfde proces als het aanmaken van Forguard-eenheden (stappen hierboven).
Sensoren aanmaken in Tags
- Log in bij Tags
- Ga naar de gatewaypagina om gedetecteerde BLE-apparaten te bekijken
- Klik op "+" naast niet-gekoppelde apparaten om sensoren aan te maken
- Of maak sensoren aan vanuit gatewayparameters via het tabblad Telemetriegegevens
Teken Aanbodovereenkomst
Wanneer u klaar bent om het platform te blijven gebruiken na de proefperiode, onderteken dan de Aanbiedingsovereenkomst.
- Ga naar de Bedrijfsbetalingsinformatie sectie
- Vul de vereiste gegevens in en upload verificatiedocumenten (bedrijfsregistratiecertificaat of bedrijfsentiteit registratiedocument)
- Verzend ter verificatie
- Na goedkeuring, lees en accepteer de Aanbiedingsovereenkomst
Dat is alles! U bent nu een volledig geautoriseerde gebruiker met volledige toegang tot het platform.
Voor Dienstverleners
Na ondertekening van de Aanbiedingsovereenkomst en voltooiing van de verificatie, ontgrendelen dienstverleners geavanceerde zakelijke hulpmiddelen:
-
Klantfacturering - PayPal en Stripe integratie met betaallink generatie en geautomatiseerde klantfacturering
-
Automatische accountblokkering - mogelijkheid om een blokkeringsdatum voor klanten in te stellen
-
Geavanceerde aangepaste branding - eigen domein (CNAME) en applicatienaam
-
Concept-eenheden - vooraf aanmaken van eenheden zonder factureringskosten tot toewijzing aan klantaccounts
Platformfuncties en Voordelen
Wat het GPS-Trace platform onderscheidt